3-3將圖片加入隨機的雜訊
程式說明:
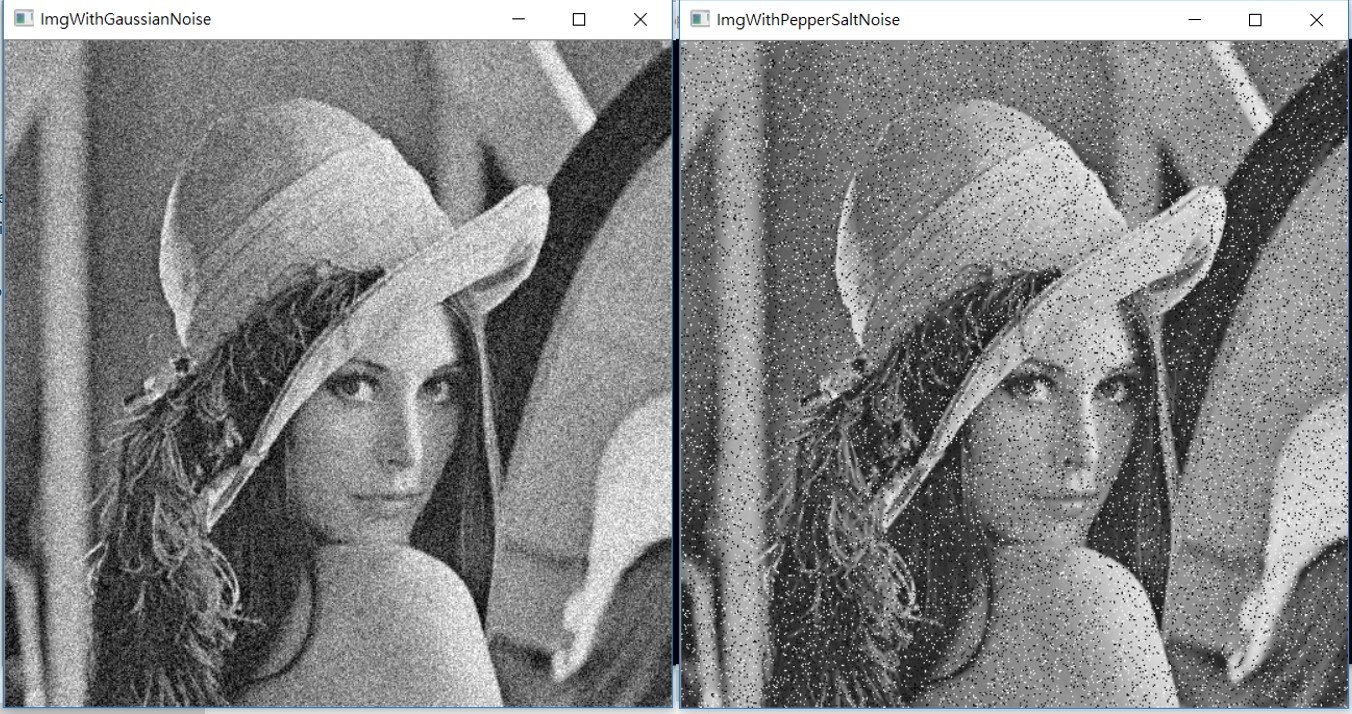
運行結果:
底下左圖是增加了高斯雜訊的部分,底下右圖則是增加了椒鹽雜訊的部分

範例程式:
#include <iostream>
#include <opencv2/opencv.hpp>
#include <opencv2/highgui/highgui.hpp>
double normal() // value = -6.0 ~ 6.0
{
double value = 0;
for (int i = 0; i != 12; ++i)
{
value += ((double)rand() / RAND_MAX); // single from: 0 ~ 1; valueTotal from: 0 ~ 12
}
return value - 6.0;
}
void SaltPepperNoiseImage(cv::Mat& Image, float threshold, int imageSize)
{
float random = 0;
int value = 0;
for (int y = 0; y < imageSize; y++)
{
for (int x = 0; x < imageSize; x++)
{
random = ((float)rand() / RAND_MAX); // from 0 ~ 1
if (random < threshold)
value = 0;
else if (random >(1 - threshold))
value = 255;
else
value = Image.at
Image.at
}
}
}
void GassianNoiseImage(cv::Mat& Image, float amplitude, int imageSize)
{
double random = 0;
int noise = 0;
int value = 0;
for (int y = 0; y < imageSize; y++)
{
for (int x = 0; x < imageSize; x++)
{
random = normal();
noise = (int)(amplitude*random);
value = Image.at
if (value>255)
Image.at
else if (value < 0)
Image.at
else
Image.at
}
}
}
int main(int argc, char** argv)
{
cv::Mat img = cv::imread("lena.bmp", 0);
if (img.empty())
{
std::cout << "無法讀取圖片" << std::endl;
return -1;
}
cv::Mat imgWithGaussianNoise = img.clone();
cv::Mat imgWithPepperSaltNoise = img.clone();
GassianNoiseImage(imgWithGaussianNoise, 30, imgWithGaussianNoise.cols);
SaltPepperNoiseImage(imgWithPepperSaltNoise, 0.05, imgWithGaussianNoise.cols);
cv::imshow("ImgWithGaussianNoise", imgWithGaussianNoise);
cv::waitKey(0);
cv::imshow("ImgWithPepperSaltNoise", imgWithPepperSaltNoise);
cv::waitKey(0);
cv::imwrite("ImgWithGaussianNoise.bmp", imgWithGaussianNoise);
cv::imwrite("ImgWithPepperSaltNoise.bmp", imgWithPepperSaltNoise);
return 0;
}